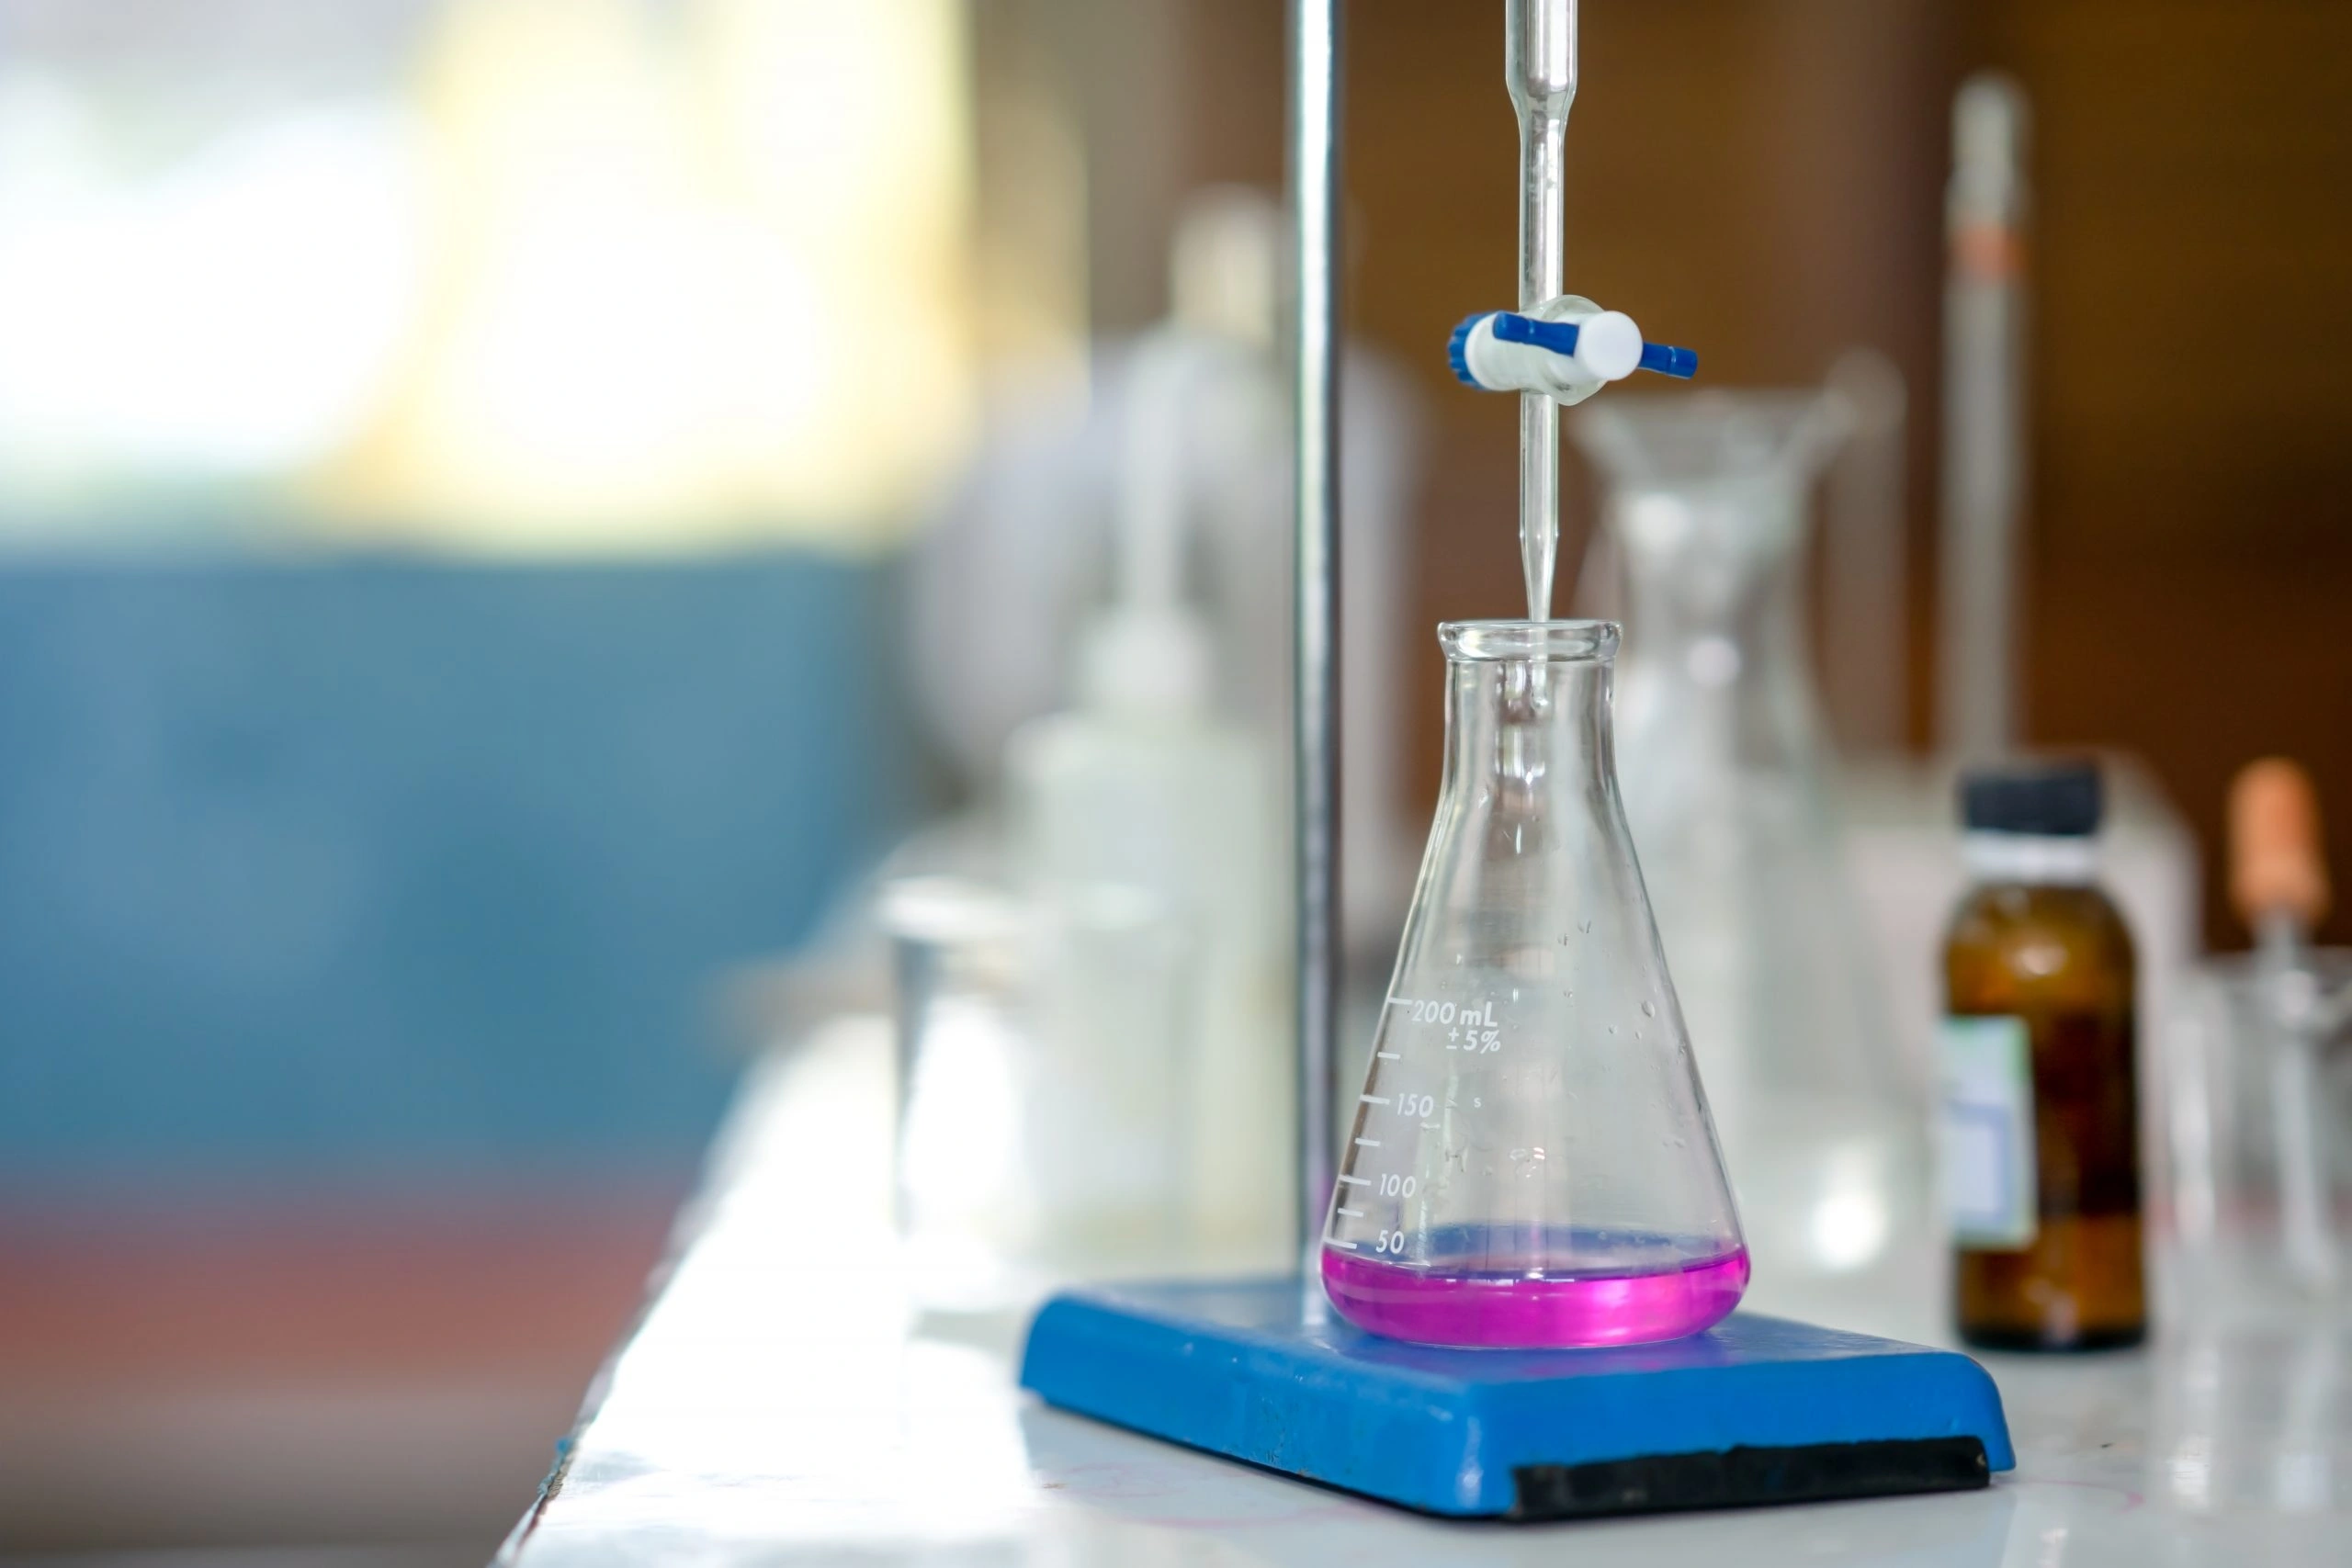
The Ultimate HSC Titration Guide: Errors, Accuracy, Reliability & Validity
The Complete HSC Titration Guide
Errors, Accuracy, Reliability & Validity — Updated for Band 6 (v3)
Subject: NESA Stage 6 Chemistry · Working Scientifically
Standard: HSC Chemistry Syllabus (NESA) · Module 6: Acid/Base Reactions, Inquiry Question 4
📚 By the SKY HSC College Chemistry team — 25+ years coaching Sydney HSC students into Band 6.
🎯 Choose Your Entry Point
Most students arrive here for one of three reasons. Pick the right starting point so you don't waste time reading sections you don't need right now.
| If you have… | Read this first | Skip to |
|---|---|---|
| ⚡ 3 minutes (test tomorrow morning) | The 3-pillar memorisation lines + the Cheat Sheet + the NESA Verbs Card | Sections 13, 21, 23 |
| ✏️ 20 minutes (writing Band 6 answers) | NESA Verb Strategy + Three Pillars + Bad-vs-Good Answer Cards + Sentence Bank | Sections 2, 7–9, 16, 17 |
| 🧠 1 hour (full mastery) | Read the entire guide in order — every NESA marker pattern is covered | Top → bottom |
| 🔬 Need to test yourself | MCQ Drill + Recall Quiz + Exam Questions by Pillar | Sections 15, 21 |
📱 Prefer to study interactively? This guide is also available as a fully interactive web app — with searchable content, MCQ self-tests with wrong-answer hints, zoomable titration curve diagrams, sentence bank, and a 1-page final-review print mode.
👉 Open the interactive Module 6 IQ4 study tool
Works on phone, tablet, and laptop. No login required.
Contents
🧩 Strategic Foundation
- The "Human Error" Trap
- NESA Verb Strategy — Match the Verb to the Structure 🆕
📐 Errors & Calculations
- Systematic vs Random Errors
- Percentage Error
- Significant Figures — The Calculation Trap 🆕
- Equivalence Point vs End Point
🏛️ The Three Pillars
- Pillar 1 — Reliability
- Pillar 2 — Accuracy
- Pillar 3 — Validity
- The Accuracy–Validity Link
🧪 Practical Procedures
- Primary Standards & Standard Solution Preparation
- Step-by-Step Titration Procedure 🆕
- Back Titration — The Band 6 Differentiator
- Full Concentration Calculation — Worked Example
- Titration Curves — All 4 Combinations
✏️ Exam Practice
- Exam-Style Questions by Pillar
📚 Reference & Recall
- Bad Answer vs Good Answer — 4 Real Examples
- Sentence Bank — Exam Phrases You Can Copy
- Band 6 Boosters — The Extension Layer
- Common Mistakes — The Seven Traps
- Cross-Module Connections — Steal Marks from Other Modules
- Recall Quiz — 10 Questions
- Quick Reference Cheat Sheet
- NESA Verbs Quick-Reference Card
1. The "Human Error" Trap
⚠️ NESA Rule: Never write "human error" in an HSC Chemistry exam. Markers will award zero marks — every single time.
The most common and costly mistake students make is confusing a mistake (blunder) with a genuine experimental error. These are fundamentally different concepts with different consequences.
| Mistake (Blunder) | Experimental Error | |
|---|---|---|
| Definition | An avoidable, one-off accident caused by carelessness | An inherent, unavoidable limitation of the equipment or method |
| Examples | Spilling a solution, misreading a scale once, using the wrong reagent by accident | Parallax error, subjective colour judgement, instrument calibration limits |
| What to do | Discard that trial immediately and repeat it. Never include it in your evaluation. | Describe it precisely using correct scientific terminology in your evaluation |
| In your report | Do not mention it at all | State whether it is systematic or random, explain its direction of bias, and describe how to minimise it |
The rule is simple:
- If it happened once due to carelessness → mistake → discard the trial and repeat
- If it is a limitation that would affect every trial regardless of how careful you are → experimental error → evaluate it properly
📝 Memorise this one-liner: "Mistakes invalidate a single trial (discard it); experimental errors affect every trial (evaluate them)."
2. NESA Verb Strategy — Match the Verb to the Structure
Most students lose marks not from weak chemistry but from answering an Assess question like a Describe question — or vice versa. Match the verb, match the structure.
2.1 The NESA Verb Hierarchy
| Verb | NESA Glossary Definition | What Changes in Your Answer | Marker Keyword |
|---|---|---|---|
| Identify | Recognise and name | One-word or one-phrase response | "is", "are" |
| Describe | Provide characteristics and features | Property → effect sentences | "is", "has the property" |
| Outline | Sketch in general terms | Brief bullet-style main points | "the main..." |
| Explain | Relate cause and effect | Add "because...", "as a result..." | "because", "as a result" |
| Justify | Support an argument with evidence | Add "this is supported by..." | "this is supported by..." |
| Discuss | Identify issues + points for/and/or against | Acknowledge both sides | "however", "by contrast" |
| Examine | Inquire into | Consider implications | "consider", "in addition" |
| Compare | Show similarities AND differences | "both X and Y...", "however" | "both", "however" |
| Assess | Make a judgement of value | Close with "On balance, ..." | "on balance", "ultimately" |
| Evaluate | Make a judgement based on criteria | Weigh X against Y explicitly | "weighing X against Y" |
📝 Verb hierarchy in one line: Identify < Describe < Explain < Justify < Discuss < Assess < Evaluate — structure escalates from list → cause/effect → weighted judgement.
2.2 The Verb Trap ⚠️
The single biggest 5-mark question mark loss: writing an Assess answer when the question says Describe — over-shoots, wastes time. Or vice versa — under-shoots, capped at half marks.
⚠️ Always circle the verb on your exam paper before you write a single word. Two seconds. Saves marks every time.
2.3 Example — Same Topic, Different Verbs
For the same content (a wrong-indicator scenario):
- Identify the error in this method: "The use of methyl orange is incorrect." (1 sentence)
- Describe the error: "The use of methyl orange is incorrect. Its colour-change range (pH 3.1–4.4) does not match the basic equivalence point of a weak-acid–strong-base titration." (2–3 sentences)
- Explain the error: Add "...as a result, the endpoint is triggered far before the equivalence point, causing a systematically low recorded titre and an underestimated acid concentration."
- Evaluate the procedure: "Weighing the equipment precision against the method flaw, the indicator choice fundamentally invalidates the experiment. On balance, no degree of equipment calibration can compensate; the procedure must be redesigned with phenolphthalein."
Same chemistry — different scaffolding. Match the verb.
3. Systematic vs Random Errors
Mastering this distinction is non-negotiable. NESA exam questions frequently require you to classify a specific error — getting it wrong costs marks across Accuracy, Reliability, and Validity questions simultaneously.
💡 The Key Test:
Ask yourself: "If I repeated this experiment 10 times with great care, would this error always push my result in the same direction?"
- Yes, always the same direction → Systematic Error → affects Accuracy
- No, it scatters unpredictably either way → Random Error → affects Reliability
3.1 Systematic Errors — Affect Accuracy
Systematic errors consistently shift every measurement in the same direction (always too high or always too low). They do not cancel out when you average your results — they are present in every single trial.
| Source of Systematic Error | Direction of Bias | How to Eliminate |
|---|---|---|
| Zero / Calibration Error — burette or pH meter not calibrated to zero | Constant offset added to every reading | Calibrate equipment before use; use calibrated glassware with valid certificates |
| Incorrect Rinsing — burette or pipette rinsed with distilled water only | Dilutes the solution; consistently lowers effective concentration | Rinse burette and pipette first with distilled water, then with the solution they will contain |
| Wrong Indicator — endpoint pH range does not match the equivalence point | Endpoint triggered too early or too late; every titre is biased the same way | Select indicator whose colour-change range brackets the equivalence point pH (see Section 9.2) |
| Air Bubbles in Burette Tip — bubble occupies volume; dislodges mid-titration | Inflates the recorded titre (titre appears larger than actual volume dispensed) | Fill the burette tip completely before starting; check for bubbles at start of each trial |
| Funnel Left on Burette — drops from the funnel drip unrecorded into the burette | Inflates the apparent titre | Always remove the funnel before beginning the titration |
⚠️ Parallax Error — Classification Depends on Consistency:
Parallax error occurs when the eye is not level with the meniscus.
- If the student consistently reads from the same incorrect angle → Systematic Error affecting Accuracy.
- If the reading angle varies unpredictably between trials → Random Error affecting Reliability.
In HSC, assume systematic unless stated otherwise.
3.2 Random Errors — Affect Reliability
Random errors are unpredictable, unavoidable fluctuations in the measurement process. Each measurement scatters randomly above and below the true value. Unlike systematic errors, they partially cancel out when you average multiple results — which is precisely why repetition is the primary strategy for improving reliability.
| Source of Random Error | Why It Is Random | How to Minimise |
|---|---|---|
| Subjective Endpoint Colour Judgement | The human eye perceives the pale pink colour change slightly differently each trial | Use a white tile; same person reads all trials; practice recognising the target colour |
| Hanging / Half-Drops | The last drop on the burette tip varies slightly in size each trial | Use the half-drop technique near the endpoint |
| Environmental Variation | Minor air currents, vibrations, or temperature fluctuations during titrant addition | Conduct experiment in a draught-free area; avoid moving the apparatus mid-trial |
| Trace Residue in Conical Flask | Unpredictable trace amounts of solution remain on the flask walls despite washing | Rinse walls thoroughly with distilled water wash bottle before recording |
3.3 Memorise These One-Line Definitions 📝
Systematic error = results shift consistently in one direction → reduces accuracy.
Random error = results scatter unpredictably around the true value → reduces reliability.
4. Percentage Error
NESA regularly asks students to calculate the percentage error of a piece of equipment and use this to justify glassware selection. This is how you prove — with numbers — why a burette is superior to a measuring cylinder.
4.1 The Formula
% Error = (Absolute Uncertainty of Equipment ÷ Volume Measured) × 100
⚠️ Important: A burette requires two readings (initial and final). Each reading has an uncertainty of ±0.05 mL, so the total absolute uncertainty = 2 × 0.05 = ±0.10 mL.
4.2 Equipment Comparison Table
| Equipment | Uncertainty (±) | Volume Used | % Error | Verdict |
|---|---|---|---|---|
| Burette (50 mL) | ±0.10 mL total (2 readings × ±0.05 mL) | ~25 mL titre | 0.40% | ✅ Highly precise |
| Volumetric Pipette (25 mL) | ±0.03 mL | 25.00 mL | 0.12% | ✅ Most precise for fixed volumes |
| Measuring Cylinder (50 mL) | ±0.5 mL | 25 mL | 2.0% | ❌ Unacceptably imprecise |
| Beaker (100 mL) | ±5 mL | 25 mL | 20% | ❌ Never use for quantitative work |
4.3 Worked Example
Question: A student uses a 50 mL burette to deliver a titre of 23.45 mL. Calculate the percentage error and compare it to using a 50 mL measuring cylinder (±0.5 mL) for the same volume.
Solution:
Burette:
- Total uncertainty = 2 × 0.05 = 0.10 mL
- % Error = (0.10 ÷ 23.45) × 100 = 0.43%
Measuring Cylinder:
- % Error = (0.5 ÷ 23.45) × 100 = 2.13%
Conclusion: The measuring cylinder introduces a percentage error approximately 5 times greater than the burette. Using a measuring cylinder to deliver the analyte aliquot is unacceptable for quantitative titration work.
5. Significant Figures — The Calculation Trap
Even with perfect technique, a titration answer can lose 1–2 marks for incorrect significant figures (s.f.) in the final concentration. NESA explicitly checks that the answer reflects the precision of the least precise measurement used in the calculation. Get this wrong and Band 6 is gone.
5.1 Significant Figure Rules for Titration Data
| Measurement | Reading | S.F. | Reasoning |
|---|---|---|---|
| Burette reading | 23.45 mL | 4 s.f. | Read to 0.01 mL (2 decimal places); zero on the left is not significant |
| Volumetric pipette aliquot | 25.00 mL | 4 s.f. | Trailing zeros after decimal count; the pipette delivers exactly 25.00 mL |
| Standard NaOH concentration | 0.1000 mol L⁻¹ | 4 s.f. | Each trailing zero counts — reflects the precision of the standardisation |
| Balance mass | 2.650 g | 4 s.f. | Balance reads to ±0.001 g |
| ❌ Avoid: rounding mid-calculation | 0.0825 → 0.083 | Wrong | Round ONLY at the final step. Mid-calculation rounding propagates error |
5.2 The Golden Rule
💡 Carry at least one extra significant figure through every step of the calculation. Round the final answer to the smallest s.f. count of any input. In a typical HSC titration calculation, that's usually 3 or 4 s.f. for the final concentration.
5.3 Worked Sig-Fig Example
Question: Using V(NaOH) = 23.53 mL (4 s.f.), C(NaOH) = 0.1000 mol L⁻¹ (4 s.f.), and V(HCl) = 25.00 mL (4 s.f.), calculate the concentration of HCl.
Solution:
- Moles NaOH = 0.02353 × 0.1000 = 0.002353 mol (carry 4 s.f.)
- Stoichiometry (1:1) → moles HCl = 0.002353 mol
- C(HCl) = 0.002353 ÷ 0.02500 = 0.09412 mol L⁻¹
- Final answer (4 s.f.): C(HCl) = 0.09412 mol L⁻¹
5.4 Common Sig-Fig Mistakes That Cost Marks
| Mistake | Why It Loses Marks | Fix |
|---|---|---|
| Writing "0.094 mol L⁻¹" (3 s.f.) when inputs are 4 s.f. | Under-reports precision | Match s.f. to the least precise input — here 4 s.f. |
| Writing "0.0941200 mol L⁻¹" (7 s.f.) | Over-reports precision; implies measurement certainty you don't have | Round to 4 s.f. — same as inputs |
| Rounding burette readings mid-calculation | Propagates rounding error through all steps | Round only at the end |
| Dropping units in the answer | Concentration without "mol L⁻¹" is meaningless | Always include units |
6. Equivalence Point vs End Point
⚠️ This distinction is directly examined by NESA and is missing from most student notes. Learn it precisely.
| Equivalence Point | End Point | |
|---|---|---|
| Definition | The theoretical point at which the moles of acid exactly equal the moles of base in the stoichiometric ratio — complete neutralisation has occurred | The practical, observable point at which the indicator permanently changes colour — what you actually record in the experiment |
| How it is determined | Calculated from stoichiometry and the known concentration of the standard solution | Observed visually when the indicator undergoes a permanent colour change |
| Is it directly measured? | No — it is a theoretical quantity | Yes — it is what you see and record |
| Connection | The goal of choosing the correct indicator is to make the end point as close as possible to the equivalence point |
6.1 Titration Error
The titration error is the discrepancy between the end point and the equivalence point. It arises from:
- Using an indicator whose colour-change range does not bracket the equivalence point pH
- Overshooting the end point
- Subjective differences in colour judgement
A well-chosen indicator minimises the titration error — it does not eliminate it entirely, because no indicator changes colour at a single, precise pH value.
6.2 Why This Matters for Validity and Accuracy
If the end point does not coincide with the equivalence point:
- The volume of titrant recorded is not the true neutralisation volume
- Every subsequent calculation is based on an incorrect titre → systematic inaccuracy
- The experimental method does not actually measure what it claims to measure → invalid
This is the chemical basis for the Accuracy–Validity Link (Section 10).
📝 One-line distinction: Equivalence point = stoichiometric neutralisation (theoretical). End point = colour change observed (practical). They coincide only when the indicator's pKₐ matches the equivalence-point pH.
7. Pillar 1 — Reliability
7.1 Definition
Reliability refers to how consistent your results are when the experiment is repeated under identical conditions. A reliable experiment has minimised random errors and produces concordant (closely agreeing) titres across multiple trials.
⚠️ Critical distinction: Reliability does not mean your results are correct. A reliable experiment can still be inaccurate if systematic errors are present — you can obtain the same wrong answer every time. Reliability is about consistency, not correctness.
📝 One-line definition: Reliability = repeatability / consistency of results across trials.
7.2 How to Ensure and Discuss Reliability
1. The Rough Titration
Always perform one rapid "rough" titration first to find the approximate endpoint volume. This tells you the region in which to slow down and add the titrant drop-by-drop in subsequent, precise titrations — preventing overshooting.
⚠️ The rough titre must never be included in your average. It is not a controlled, precise measurement — it is a scouting run.
2. Repetition
Conduct at least 3–4 precise titrations after the rough run. More repetitions provide more data points for identifying and averaging out random fluctuations.
3. Concordance
Average only concordant titres — results that agree closely with each other. A commonly used benchmark in HSC practice is within ±0.10 mL of each other. The closer your concordant titres, the stronger your evidence of reliability.
ℹ️ Note: ±0.10 mL is a widely accepted classroom benchmark. Some schools use ±0.20 mL. What matters is that you identify which titres are concordant, justify why outliers are excluded, and average only the concordant results.
4. Identifying and Discarding Outliers
Any titre that falls well outside the concordant range is an outlier, typically caused by a random error such as overshooting.
- Discard it from the average
- Note it in your evaluation
- Do not call it "human error" — describe it precisely: "a random error caused by overshooting the endpoint, resulting in an outlier that was excluded from the average"
5. The Half-Drop Technique
As you approach the expected endpoint, open the burette stopcock just enough to release a half-drop onto the glass wall of the conical flask, then rinse it down with the distilled water wash bottle. This minimises the risk of overshooting and is the standard technique for achieving concordant results.
6. Consistent Conditions Between Trials
- The same person should read the burette and judge the colour change each trial
- Place a white tile under the conical flask to standardise colour perception
- Use the same number of indicator drops each trial
7.3 Example Titre Table — How to Record, Identify, and Average
| Trial | Initial Reading (mL) | Final Reading (mL) | Titre (mL) | Include in Average? |
|---|---|---|---|---|
| Rough | 0.00 | 23.80 | 23.80 | ❌ Rough — excluded |
| Trial 1 | 0.05 | 23.55 | 23.50 | ✅ Concordant |
| Trial 2 | 0.00 | 25.10 | 25.10 | ❌ Outlier — overshoot excluded |
| Trial 3 | 0.00 | 23.60 | 23.60 | ✅ Concordant |
| Trial 4 | 0.05 | 23.55 | 23.50 | ✅ Concordant |
| Average | (23.50 + 23.60 + 23.50) ÷ 3 = 23.53 mL | ✅ Used in calculation |
Trial 2 is excluded because it is 1.50 mL outside the upper edge of the concordant range — a clear overshoot (a mistake, not an experimental error).
7.4 Model Report Sentence for Reliability
"The results of the titration are highly reliable because the experiment was repeated four times after the rough titration, and three concordant titres (Trials 1, 3, and 4) were within 0.10 mL of each other. Trial 2 was discarded as an outlier due to a random error caused by overshooting the endpoint. Only the concordant titres were averaged to minimise the influence of random errors on the final result."
8. Pillar 2 — Accuracy
8.1 Definition
Accuracy refers to how close your final calculated concentration is to the true (actual) concentration. Accuracy is decreased by systematic errors — errors that consistently bias every result in the same direction. Unlike random errors, systematic errors do not cancel out when you average your titres.
📝 One-line definition: Accuracy = closeness to the true value — affected by systematic errors.
8.2 How to Ensure and Discuss Accuracy
1. Equipment Choice — Calibrated Volumetric Glassware
Use calibrated volumetric glassware (volumetric pipettes, burettes, volumetric flasks). As demonstrated in Section 4, a measuring cylinder introduces a percentage error approximately 5 times greater than a burette for the same volume — an unacceptable systematic bias.
2. The Golden Rinsing Rules ★ (Most Commonly Examined Accuracy Topic)
This is one of the highest-yield accuracy topics in HSC Chemistry. An incorrect rinsing answer costs marks every time.
| Glassware | Rinse With | Chemical Reasoning |
|---|---|---|
| Burette | Distilled water first, then the solution it will contain (e.g., NaOH) | Residual distilled water dilutes the titrant, lowering its effective concentration. Every titre dispensed is from a solution less concentrated than intended — a systematic downward bias. |
| Pipette | Distilled water first, then the solution it will transfer (e.g., HCl) | Same reasoning — residual water dilutes the aliquot. The number of moles transferred is less than n = CV would predict. |
| Conical Flask | Distilled water only | The flask receives a fixed, pipetted number of moles of analyte. If rinsed with the analyte, extra unmeasured moles are added — overstating what is present. Distilled water is safe: it adds volume but not moles, so the stoichiometry is preserved. |
| Volumetric Flask | Distilled water only | Same reasoning as the conical flask — adding extra solution would change the number of moles in the standard solution. |
⚠️ Common exam mistake: Students often state that the conical flask should be rinsed with the analyte solution "to prevent dilution." This is wrong. Diluting the conical flask contents does not change the number of moles present. Rinsing with the analyte would add extra moles and inflate every titre — a systematic positive bias.
3. Remove Air Bubbles from the Burette Tip
Any bubble trapped in the burette tip occupies volume. When it dislodges during titration, the recorded titre becomes larger than the true volume dispensed — a systematic positive bias.
4. Read the Meniscus at Eye Level
Always read the bottom of the meniscus at eye level. Use a white card held behind the burette to sharpen the meniscus line.
5. Remove the Funnel Before Titrating
A funnel left on top of the burette may drip unrecorded solution into the burette during the titration. This inflates the apparent titre — an easy-to-eliminate systematic error.
6. Wash Down the Sides of the Conical Flask
During titration, any drops of titrant that splash onto the flask walls must be rinsed back into the solution using a distilled water wash bottle. Safe — adds water but not extra moles.
8.3 Model Report Sentence for Accuracy
"The accuracy of the titration was maximised by using calibrated volumetric glassware — specifically a 25.00 mL volumetric pipette (±0.03 mL, 0.12% error) and a 50 mL burette (±0.10 mL, 0.43% error at 23.45 mL). Systematic errors were minimised by rinsing the burette with the NaOH titrant solution prior to use, preventing dilution of the titrant. The conical flask was rinsed with distilled water only to avoid adding extra unmeasured moles of analyte. The burette tip was checked for air bubbles before each trial, the funnel was removed prior to titration, and all meniscus readings were taken at eye level to eliminate parallax error."
9. Pillar 3 — Validity
9.1 Definition
Validity relates to the experimental method itself — not the data. An experiment is valid if it:
- Actually measures what it claims to measure
- Controls all variables correctly so that a fair test is conducted
- Uses appropriate chemistry (correct indicator, correct reagents)
⚠️ Key distinction: A result can be perfectly reliable (consistent) yet completely invalid if the method is flawed. Reliability and validity are independent of each other.
📝 One-line definition: Validity = the method actually measures what it claims to measure — fair test, correct chemistry.
9.2 Part A — Identifying and Managing Variables
Why Titration Confuses Everyone (and How to Fix That)
In most experiments, variables are straightforward: change the temperature → measure the reaction rate. The IV and DV are clearly different things.
In titration, it feels trickier: you control the volume added and you record the volume added — it seems like the same thing. This confusion is normal. Here is how to untangle it.
The Mental Model: Three Steps, Three Roles
You turn the stopcock → titrant drips into the flask
                   ↓
The indicator changes colour  ← THIS is what responds
                   ↓
You record how much you added → this is called the titre
| Role | Variable | What it is | Who/what controls it |
|---|---|---|---|
| IV | Volume of titrant dispensed from the burette | What you physically manipulate via the stopcock | You (the experimenter) |
| DV | Colour change of the indicator | What responds to the titrant being added | The chemistry |
| CV | Volume of analyte in the conical flask (aliquot) | Kept constant every trial | You (fixed by pipette) |
💡 Key insight: The titre is not a third, separate variable. It is the IV's final recorded value at the exact moment the DV signals you to stop.
Independent Variable (IV)
The volume of titrant (e.g., NaOH solution) dispensed from the burette, controlled by the experimenter via the stopcock and recorded at the endpoint.
Dependent Variable (DV)
The colour change of the indicator in the conical flask, which signals that the equivalence point has been reached.
⚠️ Common mistake: Do NOT write "pH of the solution" as the DV. pH is not directly observed in a standard titration — the colour change is what you see and record.
One-Line Rule to Remember in the Exam
IV = what you manipulate (stopcock → volume in)
DV = what responds (indicator colour change)
Titre = the IV's value at the moment the DV fires
Analyte in flask = a CV (same every trial, not changed)
Variable Table — Standard NaOH vs HCl Titration
| Variable | Type | Value in This Experiment | Why It Must Be Controlled |
|---|---|---|---|
| Volume of NaOH dispensed from burette (titre) | IV | Recorded at endpoint each trial | This is the key measured quantity from which concentration is calculated |
| Colour change of indicator | DV | Permanent pale pink (phenolphthalein) | This is the observable signal that the endpoint has been reached |
| Volume of HCl aliquot | CV 1 | Exactly 25.00 mL each trial | Different volumes = different moles of acid = invalid comparison |
| Concentration of NaOH standard | CV 2 | 0.100 mol L⁻¹ (verified) | Any change invalidates all subsequent calculations |
| Number of indicator drops | CV 3 | Exactly 3 drops per trial | More drops shift the endpoint pH |
| Temperature of solutions | CV 4 | Room temperature (~25°C) | Temperature affects reaction rate and indicator colour-change ranges |
| Rinsing procedure | CV 5 | Identical each trial | Inconsistent rinsing produces different effective concentrations |
| Person reading the burette | CV 6 | Same person each trial | Different people perceive colour changes differently |
9.3 Part B — Appropriate Indicator Choice
⚠️ Choosing the wrong indicator is the most common validity error in HSC Chemistry.
The indicator must change colour (the end point) at a pH that matches the pH of the salt solution formed at the equivalence point.
| Acid–Base Combination | Equivalence Point pH | Correct Indicator | Indicator pH Range | Colour Change |
|---|---|---|---|---|
| Strong Acid + Strong Base | ≈ 7 | Bromothymol Blue | pH 6.0 – 7.6 | Yellow → (green) → Blue |
| Strong Acid + Weak Base | < 7 (acidic salt) | Methyl Orange | pH 3.1 – 4.4 | Yellow → (orange) → Red |
| Weak Acid + Strong Base | > 7 (basic salt) | Phenolphthalein | pH 8.3 – 10.0 | Colourless → Pale Pink |
📝 Indicator rule in one line: Match the indicator's pKₐ range to the pH of the salt formed at the equivalence point. Wrong salt pH → wrong indicator → invalid method.
⚠️ Why Universal Indicator cannot be used:
Universal indicator changes colour gradually across a wide pH range. It does not produce a sharp, distinct colour change at a single pH — impossible to identify a precise end point.
Common Indicator Mistakes and Their Consequences
| Mistake | Error Type | Effect on Result |
|---|---|---|
| Using phenolphthalein for strong acid + weak base | Validity flaw → systematic error | End point triggered too late; titre too high → concentration overestimated |
| Using methyl orange for weak acid + strong base | Validity flaw → systematic error | End point triggered too early; titre too low → concentration underestimated |
| Using bromothymol blue for weak acid + strong base | Validity flaw → systematic error | pH range doesn't reach basic equivalence point; stops early |
9.4 Model Report Sentence for Validity
"The experimental method was highly valid. A fair test was ensured by strictly controlling all relevant variables: the aliquot volume was fixed at 25.00 mL using a volumetric pipette, exactly three drops of indicator were added per trial, and the same person performed all burette readings. Phenolphthalein was correctly selected as the indicator for this weak acid–strong base titration, because its colour-change range (pH 8.3–10.0) appropriately brackets the basic equivalence point of the reaction. The standard NaOH solution was verified using anhydrous Na₂CO₃ as the primary standard, ensuring its concentration was accurately known prior to use."
10. The Accuracy–Validity Link
Core Insight: An invalid method guarantees an inaccurate result — regardless of how precise or well-calibrated the equipment is.
If the experimental design is chemically flawed (e.g., wrong indicator, unstable standard), the flaw directly introduces a systematic error into the recorded volume. Precision equipment cannot compensate for a broken method.
The chain of consequence:
Flawed Method (Invalid)
        ↓
End Point ≠ Equivalence Point
        ↓
Systematic Error in Recorded Titre
        ↓
Inaccurate Concentration Calculated
10.1 Worked Example of the Validity → Accuracy Chain
Scenario: A student uses methyl orange (colour change at pH 3.1–4.4) for a weak acid / strong base titration (equivalence point at pH > 7).
- The end point is triggered at approximately pH 4 — far below the true equivalence point
- The volume of NaOH recorded is systematically too low
- Substituting into the concentration formula:
C(acid) = C(base) × V(base) ÷ V(acid)
A lower V(base) produces a lower calculated C(acid) — the concentration of the acid is systematically underestimated
- The titrations may be perfectly concordant (reliable) and the burette perfectly calibrated (precise) — yet the result is still wrong because the method is invalid
📝 3-pillar pledge to take into the exam: "Reliability comes from repetition; accuracy comes from technique & equipment; validity comes from method design & variables. Never confuse them. Never write 'human error'."
11. Primary Standards & Standard Solution Preparation
11.1 What Is a Primary Standard?
A primary standard is a substance used to prepare or verify a solution of accurately known concentration. The accuracy of every subsequent calculation in the titration depends entirely on the concentration of the standard solution — so the substance used to establish that concentration must meet strict criteria.
11.2 The Four Criteria — With Full HSC Reasoning
| Property Required | What It Means | Why It Matters |
|---|---|---|
| Highly Pure | ≥ 99.9% purity; minimal impurities | Any impurity means the mass you weigh on the balance does not correspond to the true moles of standard substance. The calculated concentration of your standard solution is wrong from the outset. |
| Stable in Air | Does not react with O₂ or CO₂; not hygroscopic (does not absorb atmospheric moisture) | If the substance absorbs water or reacts with CO₂, its effective molar mass increases over time. The moles calculated from the mass are systematically wrong. See Section 11.3 for why NaOH fails this criterion. |
| High Molar Mass | As large as possible (e.g., Na₂CO₃ = 105.99 g/mol, KHP = 204.22 g/mol) | You must weigh enough mass that the uncertainty of the balance (±0.001 g) is a negligible percentage of the total. A high molar mass means a larger, more confidently measurable sample mass. |
| Highly Soluble | Dissolves completely and rapidly in water at room temperature | If undissolved solid remains, the actual concentration is lower than calculated. All subsequent titrations are systematically wrong. |
11.3 Why NaOH Cannot Be a Primary Standard
NaOH fails the "stable in air" criterion due to two simultaneous reactions:
Reaction 1 — Absorption of carbon dioxide:
2 NaOH (s) + CO₂ (g) → Na₂CO₃ (s) + H₂O (l)
Reaction 2 — Hygroscopic water absorption:
NaOH (s) + H₂O (g) → NaOH · H₂O (s)
Consequence: The solid NaOH weighed out is no longer pure NaOH — it is a mixture of NaOH, Na₂CO₃, and NaOH·H₂O. The moles calculated from the weighed mass are systematically incorrect.
Solution: Use anhydrous Na₂CO₃ as the primary standard to standardise the NaOH solution. Then use the accurately known concentration of NaOH in the main titration.
Why Na₂CO₃ is suitable: Highly pure (≥99.9% analytical grade) · Stable in air · High molar mass (105.99 g/mol) · Highly soluble.
11.4 Standard Solution Preparation — Step-by-Step Procedure
The following procedure describes how to prepare a 250.0 mL standard solution of 0.100 mol/L Na₂CO₃.
Step 1 — Calculate the required mass:
n(Na₂CO₃) = C × V = 0.100 mol/L × 0.2500 L = 0.02500 mol
m = n × M = 0.02500 × 105.99 = 2.650 g
Step 2 — Dry the primary standard (critical): Heat anhydrous Na₂CO₃ in a drying oven at 110–120°C for 1–2 hours, then cool in a desiccator.
Step 3 — Weigh accurately: Weigh approximately 2.650 g of dried Na₂CO₃ on an analytical balance (±0.001 g). Record the exact mass — do not round to 2.650 g.
Step 4 — Dissolve in a beaker: Transfer the Na₂CO₃ to a clean 100 mL beaker. Add approximately 50 mL of distilled water and stir gently until completely dissolved.
Step 5 — Transfer to a volumetric flask: Carefully transfer the dissolved solution into a 250 mL volumetric flask using a clean glass funnel and wash bottle. Rinse the beaker and glass rod with distilled water at least three times, adding each rinse to the volumetric flask.
Step 6 — Make up to volume: Add distilled water carefully until the bottom of the meniscus just touches the 250.0 mL graduation mark at eye level. Replace the stopper and invert the flask at least 10 times.
⚠️ Why a volumetric flask, not a beaker?
A beaker has an uncertainty of ±5 mL — a 2% error on 250 mL. A volumetric flask has an uncertainty of ±0.1–0.3 mL — a 0.04–0.12% error.
12. Step-by-Step Titration Procedure
A reliable, accurate, and valid titration depends on consistent technique. This section gives the exact procedure NESA expects you to be able to describe — from setting up the apparatus to recording the final titre.
🎯 Why this section matters: NESA frequently asks "Describe the procedure for the titration" or "Outline the steps." Memorising the sequence + the chemistry reason for each step is the difference between a 3-mark and a 5-mark answer.
12.1 Equipment Required
| Equipment | Purpose | Why it matters |
|---|---|---|
| Retort stand + burette clamp | Hold the burette vertical | Vertical alignment is essential for accurate meniscus reading |
| 50 mL burette | Deliver titrant in measured amounts | ±0.05 mL per reading (±0.10 mL total) — most accurate volume-dispensing equipment in HSC |
| 25 mL volumetric pipette | Deliver fixed-volume aliquot of analyte | ±0.03 mL — calibrated to deliver exactly 25.00 mL |
| Pipette filler / safety bulb | Draw liquid into pipette | ⚠️ NEVER mouth-pipette — safety hazard banned in HSC labs |
| Conical flask (100–250 mL) | Hold the analyte for titration | Conical shape allows swirling without spilling |
| Funnel | Fill the burette | Must be REMOVED before titration starts (drip risk) |
| Wash bottle (distilled water) | Rinse glassware + flask walls during titration | Used at every step — water adds volume but no moles |
| White tile | Place under conical flask | Standardises colour-change perception (reduces random error) |
| Indicator | Show endpoint | Chosen based on acid–base combination (see Section 9.3) |
| Standard solution (titrant) | Solution of known concentration | Prepared from a primary standard (e.g., Na₂CO₃) and standardised before use |
12.2 The 11-Step Procedure
Step 1 — Set up the apparatus
Clamp the burette to a retort stand so that the tip is at a convenient height (~10–15 cm above the conical flask). Place a white tile under the conical flask to standardise colour-change visibility.
Step 2 — Rinse all glassware (the Golden Rinsing Rules)
| Glassware | Rinse with | Why (chemistry) |
|---|---|---|
| Burette | distilled water, then titrant | Residual water dilutes the titrant → lower effective concentration → titre systematically too high (accuracy ↓) |
| Pipette | distilled water, then analyte | Residual water dilutes the aliquot → fewer moles transferred than expected (accuracy ↓) |
| Conical flask | distilled water ONLY | Rinsing with analyte adds extra unmeasured moles → titre systematically too high (accuracy ↓) |
| Volumetric flask | distilled water ONLY | Same reason — additional analyte changes the moles in the standard solution |
Step 3 — Fill the burette
- Use the funnel to add titrant above the 0.00 mL graduation mark.
- Remove the funnel before titration begins — drops dripping from the funnel inflate the titre (systematic error).
- Open the stopcock briefly to fill the tip below the stopcock — check there are no air bubbles (a dislodging bubble mid-titration inflates the recorded titre).
- Record the initial burette reading at the bottom of the meniscus, at eye level. Use a white card behind the burette to sharpen the meniscus and eliminate parallax error.
Step 4 — Pipette the analyte aliquot
- Use a pipette filler / safety bulb — never mouth-pipette.
- Draw the analyte above the calibration mark, then drain slowly down to the mark.
- Transfer to the conical flask: allow the pipette to drain by gravity, touch the pipette tip to the inside wall of the flask, and wait ~10 seconds for the last drop.
- Do NOT blow out the last drop — the volumetric pipette is calibrated to deliver exactly 25.00 mL with the last drop remaining in the tip.
Step 5 — Add the indicator
Add exactly 3 drops of the appropriate indicator (this must be consistent across all trials — different drop counts shift the endpoint pH). Swirl the flask gently to mix.
Step 6 — Perform the rough titration
- Open the burette stopcock and add titrant rapidly while swirling the flask.
- Stop adding when the indicator colour change first appears.
- Record the final reading and calculate the rough titre (final − initial).
- ⚠️ The rough titre is NOT included in the average — it is only used to locate the approximate endpoint volume.
Step 7 — Perform precise titrations (×3 minimum)
- Refill the burette and re-pipette a fresh analyte aliquot for each precise trial.
- Add titrant rapidly until ~1–2 mL before the expected endpoint (based on the rough titre).
- From here, add titrant drop-by-drop, swirling continuously.
- As you approach the endpoint, use the half-drop technique: open the stopcock just enough to release half a drop onto the inside wall of the flask, then rinse it down with the wash bottle.
- Stop when the colour change is permanent for ~30 seconds with continued swirling.
- Wash down the inside walls of the conical flask with the distilled water wash bottle during the titration — this adds water but no extra moles, so accuracy is preserved.
Step 8 — Record and tabulate
| Trial | Initial (mL) | Final (mL) | Titre (mL) | Include? |
|---|---|---|---|---|
| Rough | 0.00 | 23.80 | 23.80 | ❌ Rough — excluded |
| Trial 1 | 0.05 | 23.55 | 23.50 | ✅ Concordant |
| Trial 2 | 0.00 | 25.10 | 25.10 | ❌ Outlier (overshoot) |
| Trial 3 | 0.00 | 23.60 | 23.60 | ✅ Concordant |
| Trial 4 | 0.05 | 23.55 | 23.50 | ✅ Concordant |
Step 9 — Identify and exclude outliers
- Discard the rough titre.
- Discard any titre outside ±0.10 mL of the concordant group.
- For each excluded titre, write a one-line reason — e.g., "Trial 2 discarded as an outlier — an overshoot of the endpoint, a random error."
- ⚠️ Never call it "human error".
Step 10 — Average the concordant titres
Average ONLY the trials within ±0.10 mL of each other. This is the value used in the final concentration calculation.
Example: Average = (23.50 + 23.60 + 23.50) ÷ 3 = 23.53 mL
Step 11 — Calculate the unknown concentration
- Write the balanced equation first — this determines the stoichiometric ratio.
- n(titrant) = C × V (using average titre)
- Apply stoichiometric ratio → n(analyte)
- C(analyte) = n ÷ V<sub>pipette</sub>
- Report to 4 significant figures, matching the precision of your inputs (see Section 5).
12.3 Common Procedural Mistakes — and which pillar they damage
| ❌ Mistake | Effect on results | Pillar affected |
|---|---|---|
| Leaving the funnel on the burette during titration | Drips inflate the titre | Accuracy ↓ (systematic) |
| Air bubble in burette tip that dislodges mid-titration | Recorded titre too large | Accuracy ↓ (systematic) |
| Including the rough titre in the average | Average skewed (rough is usually high) | Reliability ↓ |
| Rinsing the conical flask with analyte | Extra unmeasured moles → titre too high | Accuracy ↓ (systematic) |
| Different person reading the burette between trials | Different colour perception each trial | Reliability ↓ (random) |
| Inconsistent indicator drops between trials | Endpoint pH shifts trial to trial | Validity ↓ (CV not controlled) |
| Blowing out the last drop of the pipette | Delivers > 25.00 mL aliquot | Accuracy ↓ (systematic) |
| Mouth-pipetting | Safety hazard — chemical inhalation/ingestion | ⚠️ Banned in HSC labs |
12.4 Safety 🛡️
- Wear safety goggles throughout — many titrants are corrosive (e.g., strong acid/base solutions).
- Lab coat + closed-toe shoes.
- Tie back long hair.
- If you spill any solution: notify the teacher immediately, discard that trial as a mistake (not an experimental error), and repeat.
- ⚠️ Never mouth-pipette — use a pipette filler / safety bulb.
12.5 The Pro-Tip Most Students Miss 💡
The single most-tested procedural step in HSC trial papers is the Golden Rinsing Rules (Step 2). NESA markers reward students who can not only state the rules but also explain the chemistry behind each one — why water-rinsing the burette systematically lowers the apparent concentration, why analyte-rinsing the flask adds extra moles. Memorise both the what and the why.
12.6 Exam-Ready Memorisation Summary
📝 "The burette and pipette were rinsed with distilled water followed by their respective solutions, while the conical flask was rinsed with distilled water only. A 25.00 mL aliquot of the analyte was pipetted into the conical flask with three drops of indicator. After a rough titration to locate the approximate endpoint, three concordant precise titrations were performed within ±0.10 mL, using the half-drop technique near the endpoint. The average of the concordant titres was used to calculate the analyte concentration via the balanced equation."
13. Back Titration — The Band 6 Differentiator
Back titration is the single highest-value topic that separates Band 5 from Band 6 in Module 6. It appears in roughly half of HSC and trial papers as a 5–6 mark question. Understanding the three-step logic is what makes the difference.
13.1 Why We Use Back Titration
A direct titration fails when the sample is:
- Insoluble — e.g., calcium carbonate in eggshells, antacid tablets
- Volatile — e.g., ammonia gas
- Reacts too slowly with the indicator — e.g., aspirin tablet binder
Instead, we add a known excess of one reactant, let it fully react, then titrate the excess to find out what reacted with the sample.
13.2 The Three-Step Logic
| Step | What you do | What you calculate |
|---|---|---|
| 1 | Add a known excess of Reagent A (e.g., HCl) to the unknown sample. Reagent A reacts completely with the sample. | n(A)_initial = C(A) × V(A) |
| 2 | Titrate the unreacted excess of A with a standard base (Reagent B, e.g., NaOH). | n(A)_excess = n(B)_used × stoichiometric ratio |
| 3 | Calculate moles of sample by difference. | n(A)_reacted_with_sample = n(A)_initial − n(A)_excess |
13.3 Worked Example — Calcium Carbonate in an Eggshell (5 marks)
Scenario: A 1.250 g powdered eggshell sample is added to 50.00 mL of 0.500 mol L⁻¹ HCl. After CaCO₃ in the eggshell fully reacts, the unreacted excess HCl requires 23.50 mL of 0.200 mol L⁻¹ NaOH to neutralise. Calculate the % by mass of CaCO₃ in the eggshell. (M(CaCO₃) = 100.09 g mol⁻¹)
Solution:
Step 1 — Initial moles of HCl added:
n(HCl)_initial = 0.05000 × 0.500 = 0.02500 mol
Step 2 — Moles of NaOH = moles of excess HCl (1:1 stoichiometry):
n(NaOH) = 0.02350 × 0.200 = 0.004700 mol
n(HCl)_excess = 0.004700 mol
Step 3 — Moles of HCl reacted with CaCO₃:
n(HCl)_reacted = 0.02500 − 0.004700 = 0.02030 mol
Step 4 — Stoichiometry of CaCO₃ + 2HCl → CaCl₂ + H₂O + CO₂:
n(CaCO₃) = n(HCl)_reacted ÷ 2 = 0.02030 ÷ 2 = 0.01015 mol
Step 5 — Mass and percentage:
m(CaCO₃) = 0.01015 × 100.09 = 1.016 g
% CaCO₃ = (1.016 / 1.250) × 100 = 81.3 % (3 s.f.)
13.4 Mark-Allocation Scaffold (memorise this template)
| Marks | What to write | Marker keyword |
|---|---|---|
| 1 | n(A)_initial = C(A) × V(A) (substitute values) | "initial moles of HCl added" |
| 1 | n(B)_used = C(B) × V(B) (titration result) | "moles of NaOH used to neutralise excess" |
| 1 | n(A)_excess = n(B) × (stoichiometric ratio) | "excess HCl = moles NaOH (1:1)" |
| 1 | n(A)_reacted = n(A)_initial − n(A)_excess | "by difference, moles HCl reacted with sample" |
| 1 | Convert to moles of sample → mass → % composition (correct s.f.) | "% by mass of CaCO₃" |
13.5 6-Mark Worked Example — Aspirin Tablet Analysis (HSC-style)
Scenario: A pharmaceutical chemist analyses an aspirin tablet (acetylsalicylic acid, C₉H₈O₄, M = 180.16 g mol⁻¹) by dissolving it in 25.00 mL of 0.200 mol L⁻¹ NaOH (excess). The unreacted NaOH is then back-titrated with 0.100 mol L⁻¹ HCl, requiring 18.40 mL to reach equivalence.
(a) Explain why back titration is preferred over direct titration here. (2 marks)
(b) Calculate the mass of acetylsalicylic acid in the tablet. (4 marks)
Model Answer:
(a) (2 marks): Aspirin is poorly soluble in water and dissolves slowly, so a direct titration would have a vague, drifting endpoint (low validity and accuracy). Using excess NaOH dissolves and reacts with the aspirin completely; we then determine moles of aspirin by difference, which avoids the kinetic problem entirely.
(b) Step-by-step (4 marks):
- Step 1 (1 mark): n(NaOH)_initial = 0.02500 × 0.200 = 0.005000 mol
- Step 2 (1 mark): n(HCl) used to neutralise excess NaOH = 0.01840 × 0.100 = 0.001840 mol. By 1:1 stoichiometry, n(NaOH)_excess = 0.001840 mol
- Step 3 (1 mark): n(NaOH) reacted with aspirin = 0.005000 − 0.001840 = 0.003160 mol. Aspirin + NaOH → Sodium acetylsalicylate + H₂O (1:1), so n(aspirin) = 0.003160 mol
- Step 4 (1 mark): Mass of aspirin = 0.003160 × 180.16 = 0.569 g (3 s.f.)
13.6 The Classic Back-Titration Trap ⚠️
Students often write: "n(HCl) = n(NaOH) so n(aspirin) = n(HCl) used". This is wrong.
The HCl reacts with the excess NaOH, not with the aspirin directly. The aspirin moles = (n(NaOH)_initial − n(NaOH)_excess), divided by the stoichiometric ratio of NaOH-to-aspirin.
📝 Always think: "What's left over ≠ what reacted with the sample."
14. Full Concentration Calculation — Worked Example
A titration only has value if you can convert the experimental data into a calculated concentration. This section provides a fully worked example that integrates the three pillars.
14.1 Scenario
A student titrates 25.00 mL aliquots of hydrochloric acid (HCl) of unknown concentration against a 0.1000 mol/L standard NaOH solution using phenolphthalein indicator. The following titres were recorded:
| Trial | Titre (mL) | Include? |
|---|---|---|
| Rough | 23.80 | ❌ Excluded |
| Trial 1 | 23.50 | ✅ Concordant |
| Trial 2 | 25.10 | ❌ Outlier |
| Trial 3 | 23.60 | ✅ Concordant |
| Trial 4 | 23.50 | ✅ Concordant |
| Average | (23.50 + 23.60 + 23.50) ÷ 3 = 23.53 mL | ✅ |
14.2 Step-by-Step Calculation
Step 1 — Identify the balanced equation:
NaOH (aq) + HCl (aq) → NaCl (aq) + H₂O (l)
Molar ratio: 1 : 1
Step 2 — Calculate moles of NaOH (known):
n(NaOH) = C × V
        = 0.1000 mol/L × 0.02353 L
        = 2.353 × 10⁻³ mol
Step 3 — Apply stoichiometry:
From the 1:1 ratio:
n(HCl) = n(NaOH) = 2.353 × 10⁻³ mol
Step 4 — Calculate concentration of HCl:
C(HCl) = n ÷ V
       = 2.353 × 10⁻³ mol ÷ 0.02500 L
       = 0.09412 mol/L
       ≈ 0.0941 mol/L  (4 significant figures)
⚠️ Significant figures: See Section 5. Match s.f. to your least precise input. Here all are 4 s.f., so final = 4 s.f.
14.3 Non-1:1 Stoichiometry Example — Diprotic Acid
If the acid is diprotic (e.g., sulfuric acid, H₂SO₄), the molar ratio is 1:2 (acid:base):
H₂SO₄ (aq) + 2NaOH (aq) → Na₂SO₄ (aq) + 2H₂O (l)
Calculation:
n(NaOH) = 0.1000 × 0.02353 = 2.353 × 10⁻³ mol
n(H₂SO₄) = n(NaOH) ÷ 2 = 1.177 × 10⁻³ mol
C(H₂SO₄) = 1.177 × 10⁻³ ÷ 0.02500 = 0.04706 mol/L
Always write out the balanced equation first. The stoichiometric coefficients determine the molar ratio, which determines everything else.
15. Titration Curves — All 4 Combinations
A titration curve is a graph of pH (y-axis) vs volume of titrant added (x-axis). Understanding the shape of each curve type is examinable at HSC level. NESA frequently asks you to identify the equivalence point, label the buffer region, or justify the indicator from a curve.
15.1 How to Read Every Titration Curve
Every curve has the same four features — learn to spot all four in any acid-base combination:
| Feature | What It Tells You |
|---|---|
| 1. Initial pH | Depends on the strength of the acid in the flask |
| 2. Buffer region | Flat-ish plateau where the conjugate-acid/base pair resists pH change (only present for weak acid or weak base in flask) |
| 3. Equivalence point | The steep vertical jump. The pH at the midpoint of the jump tells you which indicator to use |
| 4. Final pH | Depends on the strength of the titrant being added |
15.2 The Four Canonical Curves
Curve 1 — Strong Acid + Strong Base (e.g., HCl + NaOH)
Salt formed: NaCl (neutral) · Equivalence pH: ≈ 7
Shape:
- Initial pH ≈ 1 (strong acid)
- No buffer region — both species fully dissociate
- Very steep, sharp vertical jump centred on pH 7
- Final pH ≈ 13 (strong base excess)
Suitable indicator: Bromothymol Blue (pH 6.0–7.6).
Flexibility note: The steep section spans approximately pH 3–11, meaning phenolphthalein, bromothymol blue, and methyl orange all technically work for this combination. Bromothymol blue is the cleanest choice as its transition centres on pH 7.
Curve 2 — Weak Acid + Strong Base (e.g., CH₃COOH + NaOH)
Salt formed: CH₃COONa (basic) · Equivalence pH: > 7 (~8.7)
Shape:
- Initial pH ≈ 3 (weak acid only partially dissociates)
- Distinct buffer plateau early on — CH₃COOH / CH₃COO⁻ resists pH change
- Steep but narrower jump centred on basic pH (~8–9)
- Final pH ≈ 13
Suitable indicator: Phenolphthalein (pH 8.3–10.0).
Why basic equivalence point? The conjugate base CH₃COO⁻ hydrolyses water:
CH₃COO⁻ + H₂O ⇌ CH₃COOH + OH⁻
This produces excess OH⁻ at equivalence, pushing pH > 7.
Curve 3 — Strong Acid + Weak Base (e.g., HCl + NH₃)
Salt formed: NH₄Cl (acidic) · Equivalence pH: < 7 (~5)
Shape:
- Initial pH ≈ 11 (weak base in flask)
- Buffer plateau early on — NH₄⁺ / NH₃ resists pH change
- Steep descending jump centred on acidic pH (~5)
- Final pH ≈ 1
Suitable indicator: Methyl Orange (pH 3.1–4.4).
Why acidic equivalence point? NH₄⁺ donates H⁺ to water:
NH₄⁺ + H₂O ⇌ NH₃ + H₃O⁺
This produces excess H₃O⁺ at equivalence, pushing pH < 7.
Curve 4 — Weak Acid + Weak Base (e.g., CH₃COOH + NH₃)
Salt formed: CH₃COONH₄ (≈neutral) · Equivalence pH: ≈ 7 (but unclear)
Shape:
- Gradual S-curve with no sharp vertical jump
- Buffer regions on both sides of equivalence point
- Endpoint cannot be sharply identified
Suitable indicator: ❌ None — no indicator has a sufficiently narrow transition to catch the gradual change.
HSC implication: This combination is not used in HSC titrations. If a question references a weak-acid/weak-base system, the answer is usually that a pH meter must be used instead of an indicator.
15.3 Marker-Keyword Phrasing for Curve Questions
When discussing a titration curve, use these phrases explicitly — they directly trigger marker recognition:
- "The steep vertical region indicates the equivalence point at pH X."
- "The buffer region (where the conjugate-acid/base pair resists pH change) corresponds to the half-equivalence point."
- "The chosen indicator's pKₐ (Y) lies within the steep section, ensuring endpoint = equivalence point."
- "At the equivalence point, the salt formed undergoes hydrolysis, producing a [basic/acidic/neutral] solution."
📝 Curve rule in one line: Steep vertical jump = equivalence point. Buffer plateau = conjugate pair resisting pH change. Indicator must change colour within the steep region.
16. Exam-Style Questions by Pillar
16.1 Reliability-Only Questions
R1 — Concordance and Averaging (4 marks)
Scenario: A student performs five titrations of 0.100 mol/L NaOH against HCl of unknown concentration and records the following titres:
| Trial | Titre (mL) |
|---|---|
| Rough | 22.35 |
| Trial 1 | 22.10 |
| Trial 2 | 22.15 |
| Trial 3 | 24.60 |
| Trial 4 | 22.20 |
(a) Identify which titres should be used to calculate the average titre, and justify your selection. (2 marks)
(b) Calculate the average titre and explain how this process improves reliability. (2 marks)
Model Answer:
(a)
- The rough titre (22.35 mL) must be excluded — it is a scouting titration, not a precision measurement. (1 mark)
- Trial 3 (24.60 mL) must be excluded as an outlier — it is 2.45–2.50 mL outside the range of the other precise titres, indicating a random error such as overshooting. (1 mark)
- Trials 1, 2, and 4 are concordant within ±0.10 mL.
(b)
- Average titre = (22.10 + 22.15 + 22.20) ÷ 3 = 22.15 mL (1 mark)
- Averaging concordant results improves reliability because random errors scatter unpredictably above and below the true value. Averaging multiple results allows these random errors to partially cancel, yielding a result closer to the true titre. (1 mark)
R2 — Random Error Identification (3 marks)
Scenario: A student notices that their endpoint colour judgement seems to vary slightly between trials. Classify this error and explain its effect on the experimental results. (3 marks)
Model Answer:
- The variation in end point colour judgement is a random error. (1 mark)
- It is random because it does not consistently bias the result in one direction — sometimes the student stops too early (titre too low) and sometimes too late (titre too high). (1 mark)
- Random errors affect the reliability of the experiment. Their effect is reduced by averaging multiple trials. Reliability can be improved by placing a white tile under the conical flask, having the same person judge the colour change each trial, and using the half-drop technique. (1 mark)
R3 — Half-Drop Technique and Reliability (3 marks)
Scenario: Explain the purpose of the rough titration and the half-drop technique. (3 marks)
Model Answer:
- The rough titration is an initial rapid titration to determine the approximate end point. It allows the student to identify the volume region in which to slow titrant addition, preventing overshooting. (1 mark)
- The half-drop technique involves opening the burette stopcock just enough to release half a drop onto the glass wall, then rinsing it down with distilled water. This minimises overshooting. (1 mark)
- Together, these techniques reduce random errors caused by overshooting, making it easier to obtain three or more concordant titres within 0.10 mL. (1 mark)
R4 — Outlier Identification and Terminology (3 marks)
Scenario: Trial 3's recorded titre of 25.00 mL is much higher than the others (~23.50 mL) due to slipping and releasing excess NaOH. The student wrote: "Trial 3 was removed due to human error."
Identify two problems with this statement and provide a corrected version. (3 marks)
Model Answer:
Problem 1: Incorrect use of "human error" — this is a mistake (blunder), not a systematic or random experimental error. NESA does not award marks for the phrase "human error." (1 mark)
Problem 2: Insufficient scientific explanation — must identify Trial 3 as an outlier and state the magnitude of discrepancy. (1 mark)
Corrected Statement: "Trial 3 (25.00 mL) was identified as an outlier and excluded from the average. It is 1.50 mL outside the concordant range of the remaining trials (approximately 23.50 mL), resulting from a mistake (accidental excess dispensing) rather than an experimental error. Only the three concordant trials within ±0.10 mL were averaged." (1 mark)
16.2 Accuracy-Only Questions
A1 — Rinsing Rules (4 marks)
Scenario: Before beginning a titration of NaOH (in burette) against HCl (in conical flask), a student rinses the burette and conical flask with distilled water only.
(a) Explain the effect of rinsing the burette with distilled water only. (2 marks)
(b) Explain why rinsing the conical flask with distilled water only does NOT introduce a systematic error. (2 marks)
Model Answer:
(a)
- Residual water inside the burette dilutes the NaOH titrant, lowering its effective concentration below 0.100 mol/L. This is a systematic error. (1 mark)
- A greater volume of diluted NaOH must be dispensed to neutralise the acid, so the recorded titre is systematically too high → C(HCl) is systematically overestimated. (1 mark)
(b)
- The conical flask contains a fixed, pipetted number of moles of HCl. (1 mark)
- Adding distilled water increases the volume but not the number of moles. The stoichiometry depends on moles, not volume. The titre required to neutralise those fixed moles is unchanged. (1 mark)
A2 — Air Bubbles and Equipment Error (4 marks)
Scenario: A small air bubble in the burette tip dislodges mid-titration.
(a) Explain the effect. (2 marks)
(b) Calculate the % error of the burette (50 mL, ±0.05 mL per reading) for a titre of 21.50 mL, and explain why this does not account for the bubble error. (2 marks)
Model Answer:
(a)
- The bubble occupies volume initially. When it dislodges mid-titration, that volume is no longer occupied by air — the apparent volume of NaOH dispensed increases. The recorded titre is systematically too large. (1 mark)
- Inflated V(base) → calculated C(acid) is systematically overestimated. (1 mark)
(b)
- Total uncertainty = 2 × 0.05 = 0.10 mL
- % Error = (0.10 ÷ 21.50) × 100 = 0.465% (1 mark)
- This % error accounts only for the inherent reading uncertainty — it does not account for the volume error from air bubbles. The bubble is a separate systematic error not captured by glassware tolerance. (1 mark)
A3 — Meniscus Reading (3 marks)
Scenario: A student consistently reads the meniscus from slightly above eye level throughout. Classify this error and explain its effect.
Model Answer:
- This is a systematic error (parallax error), because the student consistently reads from the same incorrect angle. (1 mark)
- When reading from above eye level, each reading appears lower than the true position. However, if both initial and final readings have the same parallax bias, the biases approximately cancel (titre = final − initial). (1 mark)
- In practice, parallax is rarely identical between both readings (different meniscus heights, slight head shifts). Any residual difference introduces a systematic error. Correct technique: read both readings independently at eye level, using a white card behind the burette to sharpen the meniscus. (1 mark)
A4 — Equipment Selection and Accuracy (4 marks)
Scenario: A student uses a 50 mL measuring cylinder (±0.5 mL) instead of a 25 mL volumetric pipette (±0.03 mL). Calculate the % error for each and evaluate the impact on accuracy, reliability, and validity. (4 marks)
Model Answer:
- % errors: Cylinder = (0.5 ÷ 25) × 100 = 2.0%; Pipette = (0.03 ÷ 25) × 100 = 0.12%. Cylinder is ~17× greater error. (1 mark)
- Accuracy: Wide graduation marks + large tolerance → consistently transfers a volume slightly different from 25.00 mL → systematic error → calculated concentration systematically incorrect. (1 mark)
- Reliability: Random reading errors mean slightly different volumes are transferred each trial → increases titre spread → harder to obtain concordant results. (1 mark)
- Validity: Aliquot volume varies between trials → the controlled variable (volume of analyte) is not maintained → invalid comparison between trials. (1 mark)
16.3 Validity-Only Questions
V1 — Indicator Selection (4 marks)
Scenario: A student titrates ammonia (NH₃, weak base) against HCl (strong acid) using phenolphthalein.
(a) Evaluate whether this indicator is appropriate. (2 marks)
(b) Identify the correct indicator and explain why. (2 marks)
Model Answer:
(a)
- Phenolphthalein is not appropriate. (½ mark)
- The titration is strong acid + weak base → product NH₄Cl undergoes hydrolysis → equivalence point at pH < 7 (~5–6). Phenolphthalein changes at pH 8.3–10.0 — far above the equivalence point. The titration would register an endpoint only after substantial excess acid — titre systematically too high → method invalid. (1½ marks)
(b)
- Correct indicator: methyl orange (pH 3.1–4.4). (½ mark)
- Its range lies on the acidic side of pH 7, bracketing the acidic equivalence point of a strong acid–weak base titration. The colour change (yellow → orange/red) occurs at a pH close to the equivalence point, minimising titration error → valid method. (1½ marks)
V2 — Variable Identification (4 marks)
Scenario: A student titrates 25.00 mL aliquots of H₂SO₄ against 0.0500 mol/L NaOH using 3 drops of bromothymol blue. Repeated 4 times.
Identify IV, DV, and two CVs. Explain why each CV must remain constant. (4 marks)
Model Answer:
| Variable | Identification |
|---|---|
| IV | Volume of 0.0500 mol/L NaOH dispensed from burette (the titre) |
| DV | Colour change of bromothymol blue (yellow → blue at endpoint) |
| CV 1 | Volume of H₂SO₄ aliquot (25.00 mL) — different volumes = different moles = invalid comparison between trials |
| CV 2 | Concentration of NaOH standard (0.0500 mol/L) — used directly in the calculation; any change invalidates the result |
(Other acceptable CVs: number of indicator drops, temperature, person reading the burette, rinsing procedure)
V3 — Primary Standard Validity (4 marks)
Scenario: A student dissolves NaOH pellets in distilled water as their primary standard.
Evaluate whether NaOH is suitable and identify the systematic consequences. (4 marks)
Model Answer:
- NaOH is not suitable as a primary standard — it fails the "stable in air" criterion. (1 mark)
- NaOH is hygroscopic (absorbs moisture) and reacts with atmospheric CO₂:
2NaOH (s) + CO₂ (g) → Na₂CO₃ (s) + H₂O (l)
The weighed solid is a mixture of NaOH, Na₂CO₃, and H₂O — not pure NaOH. (1 mark) - The actual concentration of the NaOH solution is lower than the intended value (e.g., < 0.100 mol/L). Every calculation assumes a higher concentration than exists. (1 mark)
- In the titration: an overstated C(base) substituted into C(acid) = C(base) × V(base) ÷ V(acid) → calculated C(acid) is systematically overestimated. (1 mark)
V4 — Universal Indicator and Validity (2 marks)
Scenario: A student suggests using universal indicator instead of a specific single indicator.
Evaluate this suggestion. (2 marks)
Model Answer:
- The suggestion is incorrect. Universal indicator is not suitable for titrations. (½ mark)
- Universal indicator changes colour gradually across pH 1–14, displaying a continuous spectrum. No sharp, distinct transition at a single pH — impossible to identify a precise endpoint. (1 mark)
- A valid titration requires a sharp colour change at a specific pH. Single indicators (phenolphthalein, methyl orange, bromothymol blue) transition sharply within a narrow range. Using universal indicator makes the method invalid. (½ mark)
V5 — Controlled Variables: Indicator Drops (3 marks)
Scenario: A student adds 3 drops of phenolphthalein in Trials 1–3, but 7 drops in Trial 4.
Identify the uncontrolled variable and explain the consequence. (3 marks)
Model Answer:
- The number of indicator drops is a controlled variable not maintained in Trial 4. (1 mark)
- More indicator (a weak acid itself) means more indicator molecules to neutralise. The equilibrium between acidic/basic indicator forms shifts → colour change perceived at a slightly different pH → endpoint reached at a different volume. (1 mark)
- Validity: Trial 4 conducted under different conditions — not a fair test compared with Trials 1–3. Reliability may also be affected if Trial 4 appears as an outlier. Trial 4 should be discarded and repeated. (1 mark)
16.4 Combined / Multi-Pillar Questions
C1 — Assessing Validity and Accuracy Together (5 marks)
Scenario: A student titrates 25.00 mL vinegar (CH₃COOH, weak acid) against 0.100 mol/L NaOH using methyl orange indicator.
Evaluate the validity and accuracy. (5 marks)
Model Answer:
| Mark | Response |
|---|---|
| 1 | Judgement: The procedure is invalid. |
| 1 | Chemical reasoning: Weak acid + strong base → basic salt (CH₃COONa) → equivalence pH > 7 (~8–9). |
| 1 | Method flaw: Methyl orange changes at pH 3.1–4.4 — endpoint triggered far below equivalence point. |
| 1 | Link to accuracy: Invalid method destroys accuracy. Titration stopped too early → V(NaOH) systematically too low. |
| 1 | Final calculation: Low V(base) in C(acid) = C(base) × V(base) ÷ V(acid) → C(acid) systematically underestimated. Correct indicator = phenolphthalein. |
C2 — Assessing Reliability and Accuracy Together (5 marks)
Scenario: A student (i) rinses the burette with distilled water only and (ii) performs only two titrations (one rough, one precise).
For each decision, identify the pillar, error type, and impact. (5 marks)
Model Answer:
Decision (i) — Rinsing burette with water only:
- Affects Accuracy. (½ mark)
- Systematic error: residual water dilutes NaOH titrant. Lower effective C(base) → larger V(base) needed → recorded titre systematically too high → C(acid) systematically overestimated. (1½ marks)
Decision (ii) — Only one precise titration:
- Affects Reliability. (½ mark)
- No other results to compare → concordance cannot be established. Random errors (endpoint judgement, half-drop variation) cannot be identified or averaged out. Reproducibility unverified. (1½ marks)
(1 mark for correctly distinguishing the two issues)
C3 — "Human Error" Trap + Accuracy Assessment (3 marks)
Scenario: Student spills HCl while filling burette. Trial 2 titre is 1.50 mL higher than others. Report: "Human error caused a decrease in the accuracy of the experiment."
Critically assess. (3 marks)
Model Answer:
| Mark | Response |
|---|---|
| 1 | Statement incorrect — spilling is a mistake (blunder), not a systematic or random experimental error. "Human error" is unmarkable. |
| 1 | Trial 2 must be discarded as an outlier and the experiment repeated. Not included in any average or accuracy assessment. |
| 1 | Accuracy refers to systematic flaws in method/equipment (incorrect rinsing, uncalibrated glassware, wrong indicator) — not one-off accidents. Remaining trials' accuracy is unaffected. |
C4 — All Three Pillars (6 marks)
Scenario: A student uses a 50 mL measuring cylinder to transfer 25 mL NaOH, titrates with 0.0500 mol/L HCl using phenolphthalein, performs only two titrations (one rough, one precise), does not rinse the conical flask, and rinses the burette with distilled water only.
Evaluate reliability, accuracy, and validity. (6 marks)
Model Answer:
Reliability (2 marks):
- Only one precise titration → no concordance possible → reliability very low. (1 mark)
- Measuring cylinder introduces random variation in aliquot volume → makes concordant titres harder even if more trials were done. (1 mark)
Accuracy (2 marks):
- 50 mL measuring cylinder (2.0% error) vs pipette (0.12% error) → systematic error in aliquot volume → biases every calculation. (1 mark)
- Burette rinsed with water only → dilutes HCl titrant → systematic error → recorded titre systematically too high → C(NaOH) overestimated. (1 mark)
Validity (2 marks):
- Measuring cylinder doesn't reliably deliver 25.00 mL each trial → CV (aliquot volume) not maintained → not a fair test. (1 mark)
- Conical flask not rinsed → residual contaminants may participate in neutralisation → method doesn't measure what it claims to → validity flaw. (1 mark)
✅ Note: Phenolphthalein IS acceptable for strong acid (HCl) + strong base (NaOH) — the steep section of the SA/SB curve spans pH 3–11, so phenolphthalein, bromothymol blue, and methyl orange all work. Phenolphthalein does not constitute a validity flaw here.
17. Bad Answer vs Good Answer — 4 Real Examples
Marker reports flag the same answer patterns year after year. Here are the four most expensive ones to write — with the fix that wins the mark back.
Example 1 — Evaluating a Titration That Gave Concordant but Wrong Results
❌ Bad:
"The results are reliable so the experiment was successful."
⚠️ Why 0: Conflates reliability with accuracy. Concordant results just mean repeatability — they say nothing about whether the answer is correct. A burette with a calibration error gives concordant wrong answers every time.
✅ Fix:
"The results are highly reliable (3 concordant titres within ±0.10 mL) but this does not establish accuracy. The presence of a systematic error such as a calibration defect could shift all four titres by the same amount, leaving them concordant yet inaccurate."
Example 2 — Discussing a Wrong-Indicator Choice
❌ Bad:
"The student should have chosen a suitable indicator for this titration."
⚠️ Why 0: No chemistry. NESA wants the specific indicator, plus why — matched to the equivalence-point pH of the salt formed. "Suitable" is meaningless on its own.
✅ Fix:
"Phenolphthalein (pKₐ ≈ 9.4, transition pH 8.3–10.0) should be chosen because the weak-acid–strong-base equivalence point is basic (~pH 8.7), produced by the hydrolysis of the conjugate-base salt CH₃COO⁻."
Example 3 — Explaining a Rinsing Error
❌ Bad:
"Rinsing the burette with water was a human error that affected the results."
⚠️ Why 0: Two NESA traps in one sentence. Banned phrase ("human error") plus no chemical mechanism, no direction of bias, no error classification. Markers can't award marks for vague answers.
✅ Fix:
"Failing to rinse the burette with the NaOH titrant before use introduces a systematic error. Residual distilled water dilutes the titrant, so a larger volume must be dispensed to neutralise the analyte. Every recorded titre is consistently inflated, biasing the calculated HCl concentration upward."
Example 4 — Suggesting an Improvement
❌ Bad:
"Be more careful when reading the burette to improve accuracy."
⚠️ Why 0: "Be more careful" is not a procedure. NESA expects a specific, testable technique with an explanation of which error it addresses.
✅ Fix:
"Place a white card behind the burette and read the bottom of the meniscus at eye level. This sharpens the meniscus line and eliminates parallax (a systematic error), where reading from above or below would consistently bias the recorded volume in the same direction."
18. Sentence Bank — Exam Phrases You Can Copy
The most expensive part of an HSC response is finding the words. This bank gives you every key sentence type for every common verb. Copy, adapt, deploy.
18.1 For Reliability Questions (random errors · consistency)
- "The results are highly reliable as concordant titres of [T1, T2, T3] were obtained, all within the ±0.10 mL criterion."
- "Reliability was improved by repeating the titration [N] times after the rough run and averaging only the concordant trials."
- "The rough titre was excluded as it is not a controlled measurement and serves only to locate the approximate endpoint."
- "Trial [X] was discarded as an outlier (1.5 mL outside concordance) due to overshooting the endpoint — a random error."
18.2 For Accuracy Questions (systematic errors · closeness to true)
- "The accuracy of the titration was maximised by using calibrated volumetric glassware: a 25.00 mL pipette (±0.03 mL, 0.12% error) and a 50 mL burette (±0.10 mL total, 0.42% error)."
- "Systematic errors were eliminated by rinsing the burette with the titrant prior to use, reading the meniscus at eye level, and ensuring no air bubbles in the burette tip."
- "The funnel was removed before titrating, preventing unrecorded drips from systematically inflating every titre."
- "A white tile placed under the conical flask sharpened the colour-change observation, reducing visual judgement error."
18.3 For Validity Questions (method · variables · chemistry)
- "The method was valid because all variables were correctly identified and controlled: the IV (volume of titrant), DV (indicator colour change), and CVs (aliquot volume, indicator drops, temperature, rinsing procedure, standard concentration)."
- "Phenolphthalein (pH 8.3–10.0) was chosen as the indicator because the weak-acid + strong-base equivalence point is basic (~pH 8.7), produced by hydrolysis of CH₃COO⁻."
- "Anhydrous Na₂CO₃ was used as the primary standard as it satisfies all four criteria: high purity (≥99.9%), stability in air, high molar mass (106 g/mol), and complete solubility."
- "Each controlled variable preserves validity: changing aliquot volume changes the moles of analyte, invalidating trial-to-trial comparison."
18.4 For "Describe" Verbs (property → feature sentences)
- "The procedure involves [X], characterised by [feature]."
- "A volumetric pipette delivers exactly 25.00 mL, with an uncertainty of ±0.03 mL."
- "The titrant is added drop-by-drop from the burette as the endpoint is approached."
- "The endpoint is identified by a permanent colour change of the indicator that persists for 30 seconds with swirling."
18.5 For "Explain" Verbs (cause → effect · "because" / "as a result")
- "Because [X] occurs, [Y] follows. As a result, [Z]."
- "Residual distilled water dilutes the titrant, so a larger volume is required to neutralise the analyte. As a result, every titre is systematically too high."
- "NaOH is hygroscopic, meaning it absorbs water from the atmosphere. Because the weighed mass includes unknown water, the moles of pure NaOH cannot be determined accurately."
- "More indicator drops mean more weak acid/base to neutralise, so the apparent endpoint shifts to a higher titrant volume."
18.6 For "Assess" / "Evaluate" Verbs (judgement · "on balance" / "ultimately")
- "On balance, the experimental design was [valid/invalid] because [primary chemistry reason]."
- "Weighing the strengths against the weaknesses, the procedure achieves [accuracy / reliability / validity] to a [high/moderate/low] degree."
- "Ultimately, the use of methyl orange in a weak-acid–strong-base titration invalidates the method, as the endpoint cannot coincide with the basic equivalence point."
- "While the equipment chosen was appropriate, the procedural flaw of [X] limits overall accuracy, making the result a systematic underestimate."
18.7 For "Justify" Verbs (argument + evidence · "this is supported by")
- "This is supported by the percentage error calculation: 0.42% (burette) versus 2.08% (cylinder)."
- "The choice of indicator is justified by the basic equivalence point (pH ~8.7), which falls within phenolphthalein's transition range of pH 8.3–10.0."
- "Including only the three concordant titres (T1, T3, T4 within ±0.10 mL) is justified by the need to minimise the influence of random errors on the calculated mean."
- "This is supported by the systematic 0.15 mL deviation from the true value of 24.20 mL, indicating a calibration defect rather than random scatter."
18.8 For "Improvement / Modification" Questions (suggest a specific procedure)
- "Replace the measuring cylinder with a 25.00 mL volumetric pipette, reducing % error from 2.0% to 0.12% and eliminating systematic deviation."
- "Standardise the NaOH solution against anhydrous Na₂CO₃ primary standard prior to use, addressing the systematic error introduced by NaOH's hygroscopic nature."
- "Use a pH meter for equivalence-point detection in addition to the indicator, providing independent quantitative confirmation."
- "Conduct trials in a thermostatted water bath to control temperature, eliminating variation in reaction kinetics and indicator transition pH."
19. Band 6 Boosters — The Extension Layer
Six moves that consistently lift answers from Band 5 to Band 6. Drop in at least two on any 4-mark or longer titration response.
| # | Booster | What to Write |
|---|---|---|
| 1 | Concordance precision | Don't just say "concordant" — quantify it: "the three titres span only 0.10 mL — within the ±0.10 mL concordance criterion." |
| 2 | Endpoint vs Equivalence Point distinction | "The endpoint is the colour change observed; the equivalence point is the stoichiometric neutralisation. The two coincide only when indicator pKₐ matches the equivalence-point pH." |
| 3 | Quantitative percentage error | Always cite the specific number: "0.42% (burette) vs 2.08% (measuring cylinder) — five times lower." |
| 4 | Direction of systematic error | State whether the bias is upward or downward: "residual water dilutes the titrant → larger volume needed → titre systematically too high." |
| 5 | Why each primary-standard property matters | Don't memorise the list — explain the mechanism: "high molar mass → larger weighed mass → smaller percentage of the ±0.001 g balance uncertainty." |
| 6 | Reliability ≠ Accuracy reminder | Show you understand they are independent: "the four concordant titres demonstrate excellent reliability, but the calibration error of the burette means accuracy is still poor." |
19.1 One-liner Boosters Mid-Answer 💬
- "…by Le Chatelier's principle (Module 5), the addition of base shifts the acid–base equilibrium…" when discussing buffer behaviour.
- "…as a Brønsted–Lowry acid (Module 6), CH₃COOH donates H⁺ to OH⁻…" when discussing the titration reaction.
- "…the analytical technique parallels the gravimetric and spectroscopic methods studied in Module 8…" when discussing accuracy of analytical chemistry generally.
20. Common Mistakes — The Seven Traps
Pulled from years of NESA marker patterns and our own marking observations. Each one is the difference between Band 5 and Band 6.
| # | ❌ Trap | ✅ Fix |
|---|---|---|
| 1 | Writing "human error" | Specify the type — "random error from subjective endpoint judgement" or "systematic error from incorrect rinsing" |
| 2 | Confusing reliability with accuracy | Reliability = consistency (random errors); Accuracy = closeness to true value (systematic errors). Independent dimensions. |
| 3 | Including the rough titre in the average | Discard the rough; only average concordant titres (within ±0.10 mL of each other) |
| 4 | Listing primary-standard properties without explaining why | For each property, state the consequence: "high purity → known moles per gram → accurate concentration calculation" |
| 5 | Choosing the wrong indicator | Match indicator pKₐ range to equivalence-point pH of the salt formed (weak acid + strong base → basic salt → phenolphthalein) |
| 6 | Treating endpoint and equivalence point as identical | Endpoint = colour change observed. Equivalence point = stoichiometric neutralisation. They coincide only when indicator is correctly chosen. |
| 7 | Identifying CVs without justifying why each is controlled | For each CV, name the consequence of NOT controlling it: "different aliquot volumes = different moles = unfair comparison" |
💡 The 30-second self-check — Before submitting any titration long response, ask yourself:
(1) Did I say "human error" anywhere? — delete it.
(2) Did I distinguish systematic from random for every error I named?
(3) For Assess/Evaluate, did I include a judgement?
These three checks catch ~80% of avoidable mark loss on this topic.
21. Cross-Module Connections — Steal Marks from Other Modules
Working Scientifically outcomes are tested in every module. Markers reward students who explicitly connect titration techniques to chemistry from Modules 5, 6, 7, and 8.
21.1 Module 5 — Equilibrium (Le Chatelier in titrations)
Buffer regions of the titration curve are pure Le Chatelier — adding small amounts of acid/base shifts the conjugate-pair equilibrium with minimal pH change. The equivalence-point pH itself is determined by the equilibrium of the salt formed.
"By Le Chatelier's principle (Module 5), the addition of NaOH shifts the CH₃COOH/CH₃COO⁻ equilibrium toward the conjugate base, producing the basic equivalence point."
21.2 Module 6 — Acid/Base Reactions (Native Module)
This entire dot point sits in IQ4. The Brønsted–Lowry framework explains why the titration works: the acid donates H⁺ to the base, producing salt + water. Indicator selection is pure Brønsted–Lowry chemistry — match the pKₐ of the indicator to the pH of the salt.
"Phenolphthalein has pKₐ ≈ 9.4, which matches the basic equivalence-point pH (~8.7) of the weak-acid–strong-base titration."
21.3 Module 7 — Organic Chemistry (Carboxylic Acid Titration)
Vinegar (ethanoic acid) and other carboxylic acids in Module 7 are commonly titrated against NaOH to determine concentration. The same Brønsted–Lowry chemistry, the same indicator-selection logic, the same primary-standard requirements apply.
"The −COOH group of ethanoic acid (Module 7) donates H⁺ to OH⁻ — the same Brønsted–Lowry mechanism that drives all acid–base titrations."
21.4 Module 8 — Analytical Techniques (Sister Analytical Methods)
Titration is one of three quantitative analytical techniques in HSC Chemistry. The others — gravimetric analysis and spectroscopy (AAS, UV-vis, colorimetry) — share the same reliability/accuracy/validity framework. Discussing the comparative strengths of each is a Band 6 move.
"Compared with AAS (Module 8), titration provides direct stoichiometric quantification without requiring instrument calibration against external standards."
21.5 The Takeaway 🎯
For any 5-mark or longer titration response, drop in one cross-module sentence using the exact phrasing "as in Module N…" or "by [concept] from Module N…". Markers explicitly recognise this language and reward integration.
22. Recall Quiz — 10 Questions
Drill yourself: read each question, write your answer down (or say it out loud), then scroll to the Answers section to check. If wrong, re-read the relevant section above.
Questions
- What's the official phrase NESA refuses to award marks for?
- Concordance criterion in mL?
- Two examples of systematic errors specific to a burette.
- Which dimension does a random error decrease — accuracy or reliability?
- Why must the conical flask be rinsed with water ONLY?
- Indicator for a strong-acid–weak-base titration?
- List the four properties of a primary standard.
- Why is NaOH unsuitable as a primary standard?
- What's the difference between the endpoint and the equivalence point?
- For a 24 mL titre, which is more accurate — 50 mL burette (±0.10 mL total) or 50 mL measuring cylinder (±0.5 mL)? Cite percentage errors.
⚠️ Don't peek before you've answered. The whole point is to test recall.
Answers
- "Human error". Specify systematic or random instead.
- ±0.10 mL between concordant titres.
- Air bubbles in the tip · funnel left on top during titration · parallax error (consistent angle) · zero/calibration error.
- Reliability. Random errors create scatter; averaging concordant titres minimises them.
- Rinsing with the analyte adds extra unmeasured moles, systematically inflating the titre. Water alone doesn't change the moles.
- Methyl orange (pH 3.1–4.4), because the equivalence point is acidic (salt of strong acid + weak base).
- Highly pure (≥99.9%) · stable in air · high molar mass · highly soluble.
- NaOH is hygroscopic (absorbs water from air) and reacts with atmospheric CO₂ — the weighed mass doesn't correspond to known moles of pure NaOH.
- Endpoint = colour change observed by the student. Equivalence point = stoichiometric neutralisation. They coincide only if the indicator pKₐ matches the equivalence-point pH.
- Burette: (0.10 / 24) × 100 = 0.42%. Measuring cylinder: (0.5 / 24) × 100 = 2.08%. Burette is ~5× more accurate.
23. Quick Reference Cheat Sheet
| Pillar | Definition | Error Type Addressed | Key Strategies | Common Flaws (Never call these "human error") |
|---|---|---|---|---|
| Reliability | Consistency of results when repeated | Random errors (unpredictable scatter) | Repeat 3+ times after rough; average concordant titres within ±0.10 mL; discard outliers with reasoning; use half-drop technique; white tile; same person reads all trials | Subjective colour change judgement; inconsistent drop size; overshooting the end point |
| Accuracy | How close the result is to the true concentration | Systematic errors (consistent bias) | Calibrated volumetric glassware; correct rinsing rules; read meniscus at eye level; remove air bubbles and funnel; wash down flask walls | Rinsing burette with water only; air bubbles dislodging mid-titration; parallax (consistent); funnel drip unrecorded |
| Validity | Whether the method measures what it claims to | Method flaws (unfair test / wrong chemistry) | Identify IV, DV, and all CVs; correct indicator for acid–base pair; use stable primary standard; define and maintain all controlled variables | Wrong indicator for combination; inconsistent aliquot volume; varying indicator drops; unstable primary standard (NaOH) |
📝 The 3-pillar pledge to take into the exam: "Reliability comes from repetition; accuracy comes from technique & equipment; validity comes from method design & variables. Never confuse them. Never write 'human error'."
Key Formulae
| Formula | Use |
|---|---|
% Error = (Absolute Uncertainty ÷ Volume Measured) × 100 | Justify equipment selection; compare precision |
n = C × V | Calculate moles from concentration and volume |
C(acid) = C(base) × V(base) ÷ V(acid) | Calculate unknown concentration (1:1 ratio) |
C(acid) = C(base) × V(base) ÷ (ratio × V(acid)) | For non-1:1 stoichiometry, where ratio = stoichiometric coefficient of base per mole of acid (e.g., H₂SO₄ + 2NaOH → ratio = 2) |
n(sample) = n(A)_initial − n(A)_excess | Back titration — moles of sample by difference |
Indicator Quick Reference
| Titration Type | Equivalence Point | Correct Indicator | pH Range | Colour Change |
|---|---|---|---|---|
| Strong Acid + Strong Base | ≈ pH 7 | Bromothymol Blue | 6.0 – 7.6 | Yellow → (green) → Blue |
| Strong Acid + Weak Base | < pH 7 | Methyl Orange | 3.1 – 4.4 | Yellow → (orange) → Red |
| Weak Acid + Strong Base | > pH 7 | Phenolphthalein | 8.3 – 10.0 | Colourless → Pale Pink |
| Weak Acid + Weak Base | ≈ pH 7 (variable) | Not suitable | — | No sharp end point |
Error Classification Summary
| Error | Type | Pillar |
|---|---|---|
| Burette rinsed with water only | Systematic | Accuracy |
| Parallax (consistent angle) | Systematic | Accuracy |
| Parallax (variable angle) | Random | Reliability |
| Air bubble dislodging | Systematic | Accuracy |
| Funnel left on burette | Systematic | Accuracy |
| Subjective end point colour | Random | Reliability |
| Overshooting end point (discarded as outlier) | Mistake/Random | (Exclude from average) |
| Wrong indicator | Validity flaw → Systematic | Validity → Accuracy |
| Measuring cylinder for aliquot | Systematic + Random | Accuracy + Reliability + Validity |
| NaOH used as primary standard | Validity flaw → Systematic | Validity → Accuracy |
| Inconsistent number of indicator drops | Validity flaw (CV not controlled) | Validity |
| Universal indicator used | Validity flaw | Validity |
| Wrong significant figures in final answer | Calculation error | (Not pillar — separate marker check) |
| Incorrect back-titration logic (n(sample) ≠ n(A)_excess) | Conceptual error | (Significant calculation marks lost) |
24. NESA Verbs Quick-Reference Card
Print, fold, take into the exam mentally.
| Verb | NESA Glossary | Marker Keyword |
|---|---|---|
| Identify | Recognise and name | "is", "are" |
| Describe | Provide characteristics and features | "is", "has the property" |
| Outline | Sketch in general terms | "the main…" |
| Explain | Relate cause and effect | "because", "as a result" |
| Justify | Support an argument with evidence | "this is supported by…" |
| Discuss | Identify issues + points for/and/or against | "however", "by contrast" |
| Examine | Inquire into | "consider", "in addition" |
| Compare | Show similarities AND differences | "both X and Y…", "however" |
| Assess | Make a judgement of value | "on balance", "ultimately" |
| Evaluate | Make a judgement based on criteria | "weighing X against Y" |
🎯 Ready to lock in Band 6?
At SKY HSC College, we coach Sydney HSC students into Band 6 with the marker-keyword precision and exam strategy you've just read — in person, in Strathfield.
- 📍 Strathfield-based, in-person tutoring — walk-in distance from Strathfield station; no online-only compromise.
- 👥 Small groups of 4–12 students — focused attention without the price tag of one-on-one.
- 🎯 All four HSC subjects under one roof — Maths, Physics, Chemistry, and English. No shopping around.
- 📅 Open every day, including Sundays — drop in to self-study whenever you need to, class or no class.
- 🎓 25+ years coaching Sydney HSC students into Band 6 — depth of experience a typical tutor's resume can't match.
No commitment. Bring your last test or assessment, and we'll show you exactly where your marks went and how to claw them back.
SKY HSC College · NESA Stage 6 Chemistry · Module 6 IQ4 · Working Scientifically